Getting Started
Everything you need to go from nothing to a running P1 site with the local editor connected to a real backend.
Quick start
Already have a P1 account and just want the commands? This is the whole path, condensed: see Steps below for the full walkthrough (dashboard screenshots, secret names, what each one does) if anything here doesn’t make sense.
pnpm create @pantheon-systems/p1-starter-kit
cd your-site-name
pnpm install
Then, in the P1 dashboard : create a site, generate a token (scope: “All content including draft” for a first pass), and copy the site ID.
# .env.local
NEXT_PUBLIC_CSS_SITE_ID=your-site-id
CSS_API_KEY=your-token   # NOT P1_CSS_API_KEY: see Known Issues below
pnpm devVisit http://localhost:3000/p1 to confirm the editor connects to the backend.
Don’t skip adding a .gitignore before your first commit: the starter kit doesn’t
ship one. See step 2 and
Known Issues.
Steps
- Set up a Pantheon Content account
- Create a Next.js site with the starter kit
- Create a P1 site in the Content Dashboard
- Set your Next.js site secrets
- Deploy to a dev site on Pantheon.io
- Adding P1 to an existing Next.js site
Steps 1–4 get you a working local setup. Steps 5–6 are for when you’re ready to deploy.
1. Set up a Pantheon Content account
Sign up for a P1 account at content.pantheon.io . This is still a private release: get in touch with Pantheon and they’ll manually provision access for you.
2. Create a Next.js site with the starter kit
On your local environment, initialize a site using the SDK starter:
pnpm create @pantheon-systems/p1-starter-kitAnswer the CLI’s prompts. These instructions assume pnpm; if you use yarn or npm,
translate the commands below accordingly: the equivalents aren’t always a 1:1 swap of
the word pnpm.
Then:
pnpm install- Add a
.gitignore(the starter kit doesn’t ship one; see Known Issues) - Commit and push to your GitHub repository
3. Create a P1 site in the Content Dashboard
Create your site in the P1 dashboard at content.pantheon.io .
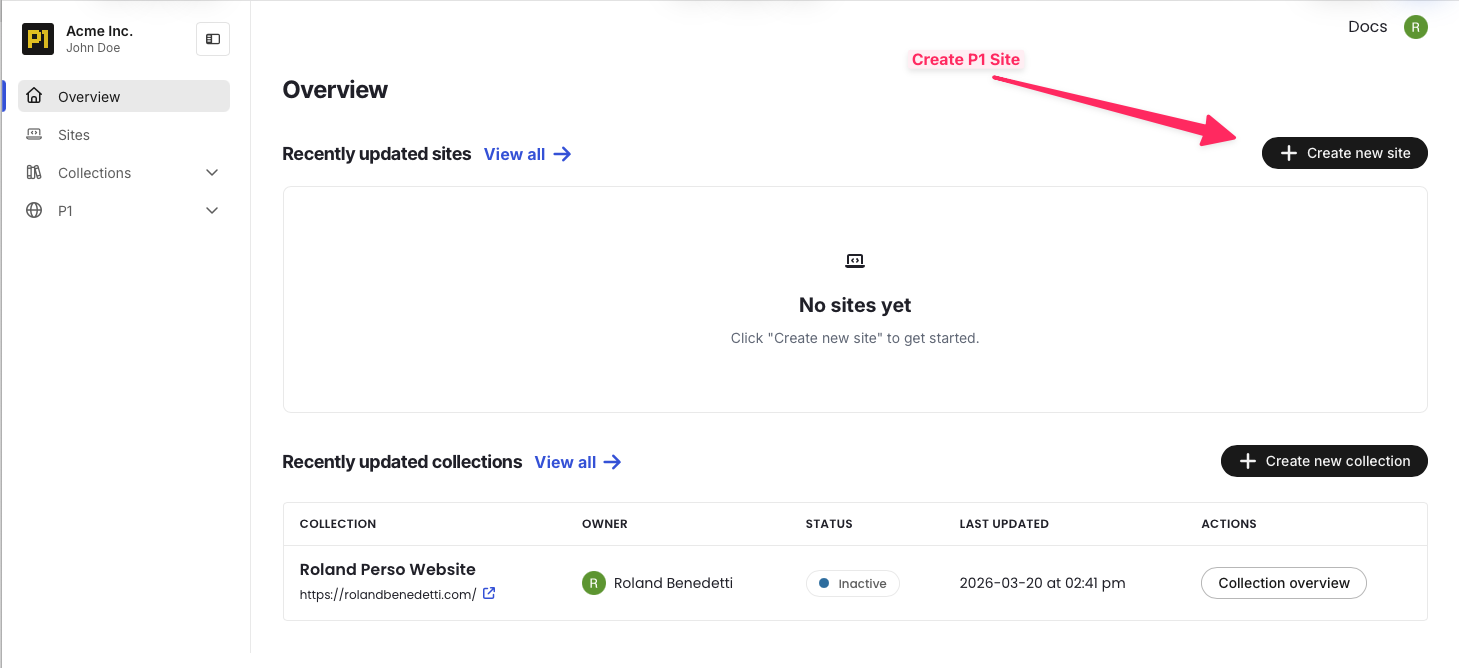
Once the P1 content site is created, generate a token and grab your site ID.
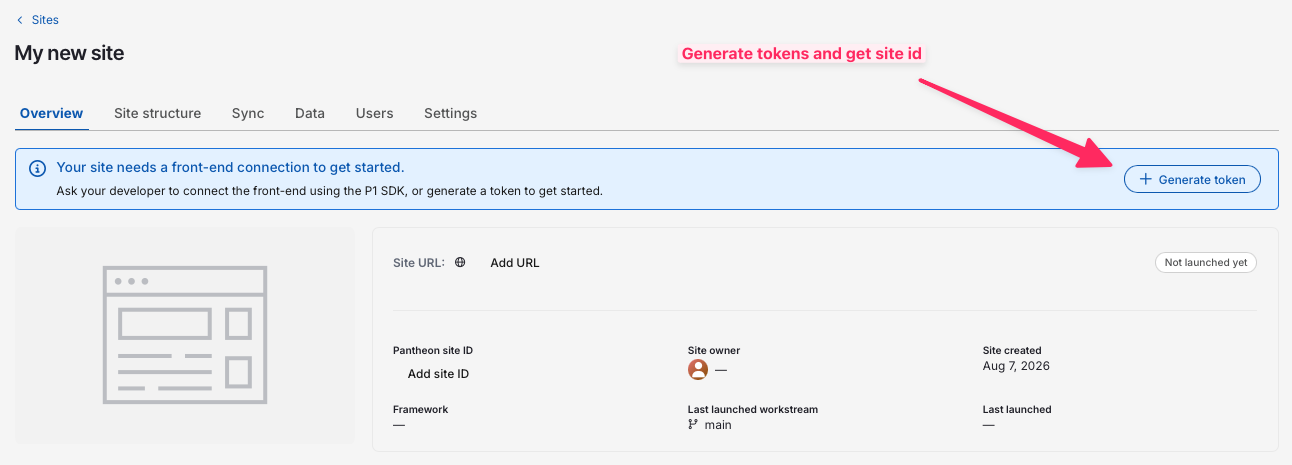
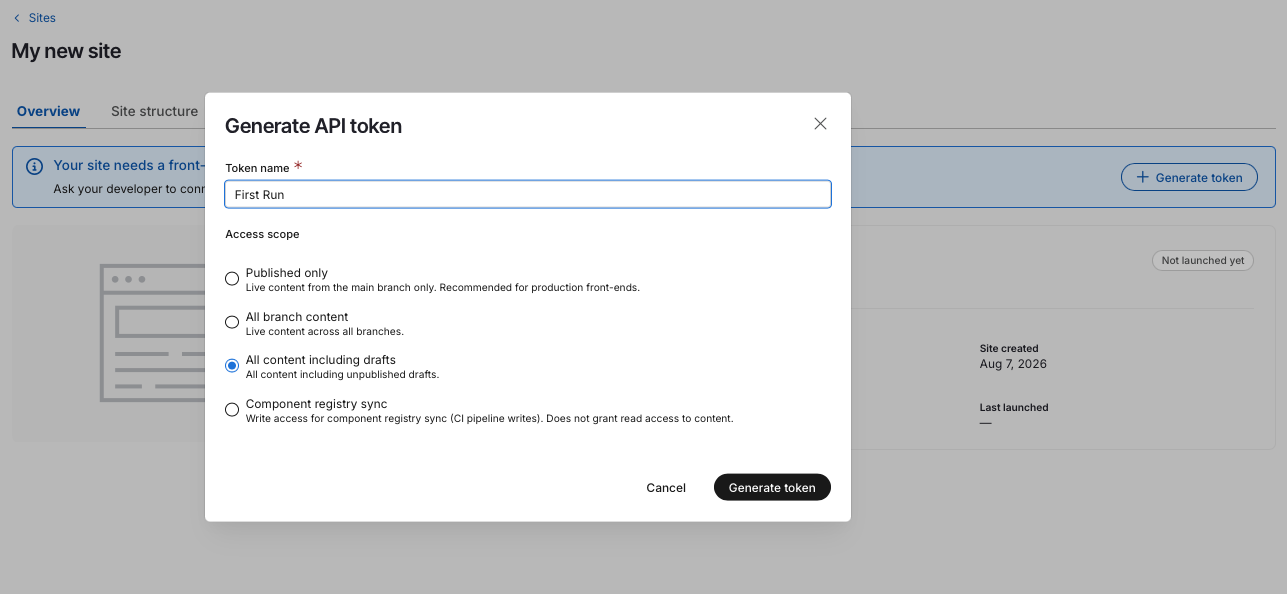
Choose the scope you want for that first token: typically “All content including draft” for a first use.
The token is only shown once. Save it somewhere secure immediately, or keep the modal open until you’ve used it; see step 4.
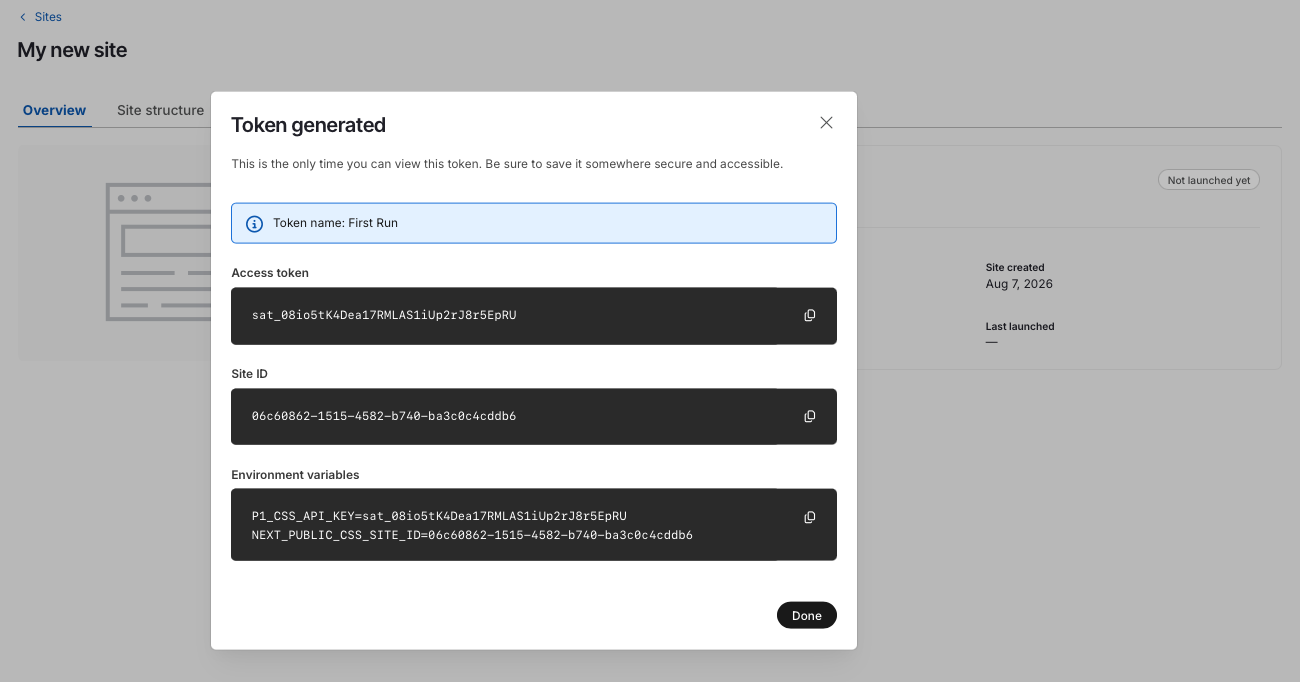
The env var name the dashboard implies for this token doesn’t match what the app actually reads; see Known Issues before you paste it in.
4. Set your Next.js site secrets
Set these secrets on your Pantheon Next.js site. Your local .env.local can omit
P1_SITE_URL (it’s only used as the post-login redirect location).
NEXT_PUBLIC_CSS_SITE_ID=your-site-id-from-step-3
CSS_API_KEY=your-token-from-step-3
P1_SITE_URL=your-site-url-once-you-have-it-you-can-start-without-it-for-local-dev
Check the site runs on localhost:
pnpm devTest connectivity with the P1 backend specifically by visiting the editor page:
append /p1 to your site URL (e.g. http://localhost:3000/p1).
5. Deploy to a dev site on Pantheon.io
- Push the codebase from step 2 to a GitHub repository
- Go to the Pantheon.io dashboard to create your hosted Next.js site
- Create a Next.js site, choosing “from an existing repository,” and pick the repository you just pushed
- When asked for secrets, paste the ones from step 4. For
P1_SITE_URL, the value should behttps://dev-yoursitename.pantheonsite.io - Deploy
At this stage you should be able to test P1 end to end with a hosted site on Pantheon.
From there, you can deploy to a test or live environment following Pantheon’s devops documentation . A live environment is required for any production use, and in particular to set your own domain name.
6. Adding P1 to an existing Next.js site
Prerequisites:
- A site already hosted on the Pantheon Next.js platform
- Your local environment available for development
Pantheon’s own docs mark this section “Instructions coming soon”; as of this writing, it’s still unwritten upstream. See Known Issues.